
Producing print materials in-house offers several significant benefits compared to outsourcing to a print shop. First and foremost, it allows businesses to maintain complete control over the production process, enabling quick adjustments to content, layout, or quantity without the delays often associated with external vendors. Additionally, it reduces costs for small to medium print runs, eliminating markups and shipping expenses. In-house production is particularly advantageous for companies with frequent or time-sensitive printing needs, as it ensures faster turnaround times. By leveraging the capabilities of modern business printers, organizations can achieve professional-quality results while saving time and money.
This guide will help you understand how to create professional-grade booklets, brochures, and flyers in-house using modern business printers equipped with automatic folding and stapling features.
 Step 1: Plan Your Publication
Before diving into design software, it’s essential to define the purpose, audience, and format of your publication:
- Determine the Purpose: Are you creating a booklet for an internal training session, a promotional brochure, or a flyer for an event?
- Audience: Consider the target audience’s preferences and what kind of visual language will engage them.
- Format: Decide on the final size and layout of your publication (e.g., letter, legal, or custom sizes). Most office printers can handle a variety of paper sizes, so choose one that suits your project’s purpose and budget.
Step 2: Create Your Layout in Design Software
Popular design software such as Adobe InDesign, Canva, or Microsoft Publisher offers templates and tools specifically tailored to brochures, booklets, and flyers.
- Set Up Your Document: In your design software, set up the document with the correct dimensions and include a bleed margin if your printer supports edge-to-edge printing. This helps avoid any white edges after trimming.
- Define Your Layout: Use grids and guides to structure content evenly. Organize text, images, and graphics so they’re easy to follow and visually appealing.
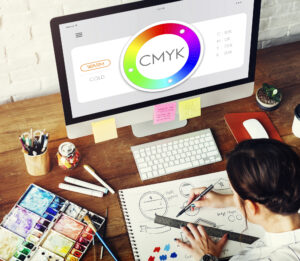
- Use High-Quality Assets: Ensure all images, logos, and graphics are high-resolution (300 DPI) for professional print quality.
- Add Folding and Stapling Guides: Many design software programs allow you to add fold marks or guides, which help with designing around folds and staples, especially for booklets.
Step 3: Configure Print Settings for Automatic Folding and Stapling
Now that your design is ready, it’s time to set up your printer’s folding and stapling functions. Most modern business printers with multifunction capabilities include automatic features for saddle-stitching, booklet-making, and bi- or tri-folding.
- Load the Correct Paper Size and Type: Select a paper weight suitable for the type of publication. Heavier paper is ideal for covers or high-quality brochures, while lighter paper can be used for flyers.
- Access Print Settings: Open your print dialog box from within the design software. Choose the correct printer and navigate to the advanced options to enable folding and stapling settings.
- Choose the Binding Type:
- Saddle-Stitching: For booklets, enable saddle-stitching. This setting folds pages and staples them along the centerline.
- Corner Stapling: If you only need single-page flyers that require a staple, choose corner stapling.
- Folding Options: Enable bi- or tri-folding if you’re printing brochures.
- Preview Before Printing: Use the print preview function to check that content aligns properly with folds and staples.
Step 4: Print a Test Copy
Producing a test copy can help you spot any alignment or formatting issues before you print the entire batch.
- Check Print Quality: Look at image resolution, text clarity, and color accuracy.
- Ensure Proper Folding and Stapling: Verify that the folds and staples are where you expected and that there’s no interference with important content.
- Make Adjustments if Necessary: Adjust margins, spacing, or image positioning based on your test print.
Step 5: Finalize and Print Your Publication
Once you’re satisfied with the test copy, proceed with printing the final batch.
- Print in Batches: Depending on the quantity and complexity, consider printing in small batches to ensure consistent quality and reduce paper jams.
- Quality Check: Periodically inspect the output to ensure each copy meets your standards.
- Finishing Touches: If needed, trim the edges for a full-bleed look, especially if your printer cannot print edge-to-edge.
Step 6: Distribute Your Professional Publication
With the final copies in hand, your publications are ready to be distributed! Producing these in-house not only saves time and money but also gives you greater control over quality and quantity.
Final Tips for Producing In-House Publications
- Use High-Quality Paper: Heavier stock paper often results in a more polished finish and professional look.
- Optimize Color Settings: Many modern printers offer color calibration options to ensure your printed colors match what you see on screen.
- Regularly Maintain Your Printer: Keeping your printer in good condition will help prevent smudging, paper jams, and misalignment.
By following these steps and utilizing your printer’s automatic folding and stapling features, you can create professional-grade publications right in your office. This approach is ideal for companies looking to produce materials on demand without compromising quality.
If you’d like more information on publication printing, folding and stapling accessories from DEX Imaging, feel free to contact one of our DEXperts: